My Doll House Miniature Projects

My Doll House Miniature Projects

Saturday, April 16, 2011

Palm Sunday, Hosanna-"save"

Hosanna

The people of Jesus' day thought he came to save them from the bondage of the cruel Roman Empire that ruled over them but the reason He came to save us from the cruel bondage of sin that rules over us!

Wednesday, March 30, 2011

My GD's beach scene-Anna's

I guess she never got posted on the blog!!!
Anna was the first to make a beach
scene then Stephanie wanted one.
We made this 2 years ago I think


Give away Promise-100 followers

I will make the give away in May.
I will post it then So sorry but
can not do it now.

Thursday, March 17, 2011


I am part Irish :))

You can read more of the ture story of St. Patrick

http://www.christianitytoday.com/ch/news/2004/stpatricks.html

Sunday, March 6, 2011

My blog's 1rst Anniversary & 100 followers!


It's also my late baby sister's birthday
today Lois went to be with Jesus at 29 years old. Miss her dearly. She would have been 59 years old today.

I reached one hundred followers today and I plan on doing a give away SOON!!

Thursday, February 17, 2011

MY FIRST BLOG WIN!!


OH, I am so excited! I am one of two winners from a give away from Miniature Mumblings. Thank you so much!!
It's an unfinsihed road side stand! visit her blog
http://minimumbler.blogspot.com

Friday, February 4, 2011

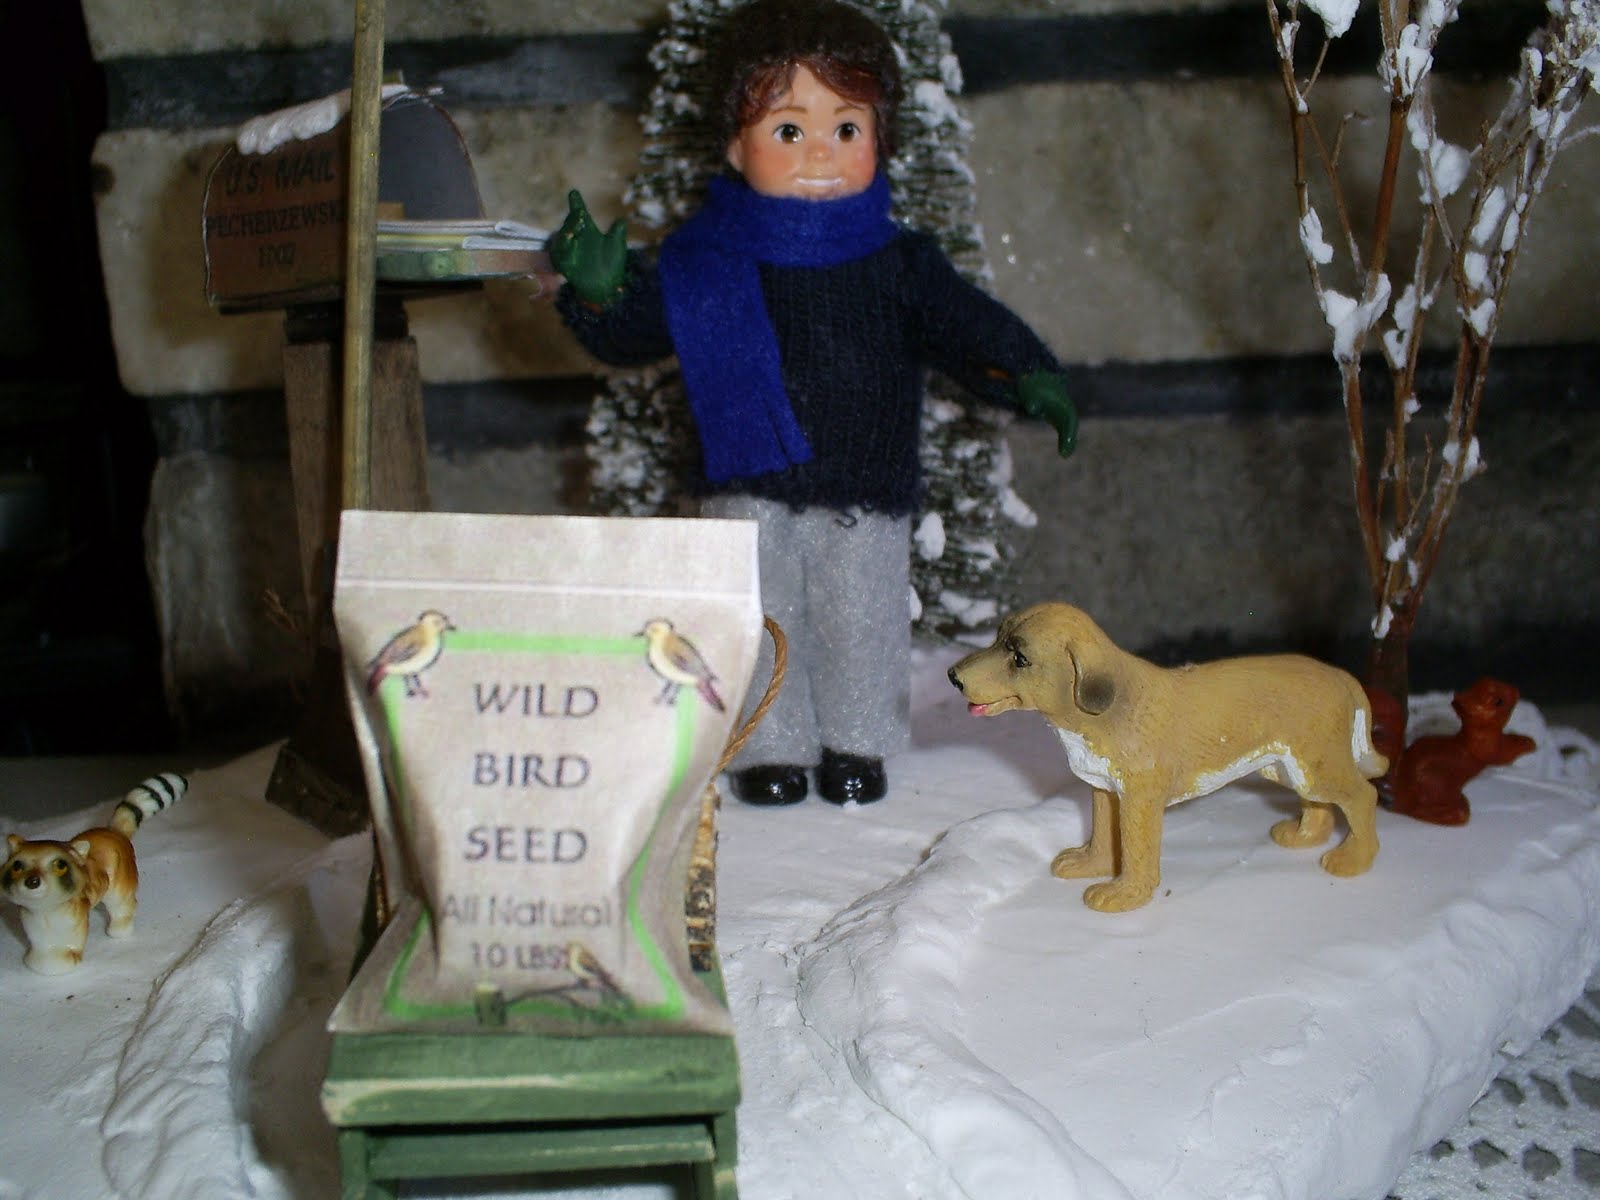
My "Winter Chores Scene" tut by Joann Swanson

 
This was so much fun to make


I found Joann Swason's blog and her wonderful project called Winter Chores.
Please take a look at her blog for some wonderful tutorial! She is the inspiration for this project. This is my boy "Walter" named after my dear hubby who always does his chores! http://joannswansondiyminiatures.blogspot.com/2011_02_01_archive.html My last name is on the mail box and house number. This made it so nice to have it personalized. This is a redressed Fisher Price doll you can find at most stores where toys are sold

Friday, December 31, 2010

My Christmas dolls and miniatures


I have more dolls but these are the newest ones I wanted. I am so happy with them.
I got them from family ordered from Minatures.com (HBS) Hobby Builders Supply.
I can't wait to use them I will repost all my peeps I have collected soon.
I recieved the cabinet,broom and placemats from my RL group gift exchange.
I hope everyone has a safe, healthy and blessed new year of 2011!

Friday, December 10, 2010

Free printable for Christmas

This is not a mini but a beatuiful word art
I wanted to share with you all!
see the right side for it and
Pink Lemonade for the instructions!

Wednesday, October 27, 2010

The winner is....


The WINNER!

I will email you for more info congratulations!!
Thank you to all my new and old followers for joining in for my first give away!

I am working a "Gift" foamcore box


Here's the beginning of my foam core box..it's still in the rough. I copied the dimentions off from an anniversary box my friend and I worked on. I made it just a bit shorter.I am thinking of making this into a "Christmas Gift" type box with a pretty bow on top. I have to cover the out side with somethng like fabric and see if i can get a plexiglass cover for the front.I have a few ideas churning around but not sure yet..stay tuned. Update:  Now go see Dec 11, 2013 posting and what I did with this box!

My plants and flowers I made


I made these a few days ago
some are parmties some silk flowers and leaves.

Crutches-TUT


Crutches

Use a long skewer, cut 2 pieces, each 4" long.

Starting carefully at the top, use a craft knife to split the skewer, checking that the split is centered. Cut down and push to split it until you get almost to the bottom.

Leave a small section uncut, about 1".

Cut 2 tiny pieces for the "hand" part, about 3/8 ".

Using tweezers, dip the ends in glue. Open the split and glue between where the hands should go..(1 1/8 inches from the top). Let dry a bit.
Use a small rubber band at the top to squeeze the top splits so they bend slightly inward for the arm cushions.
Add air dry clay to make the cushions for the arm pit and the bottom tips. Let dry with the rubber band on it for a day. Make sure it is thoroughly dry. Remove the rubber band.
Paint the tips and the arm rests to resemble rubber. Wind white thread as shown at the end of the split.

Tuesday, October 26, 2010

The Luggage Set drawing is tomorrow!

I will draw the winners name at 6 PM ET
also if you already are a follower just leave a comment
that you would like to participate.
(You must live in the USA or Canada)

Wednesday, October 20, 2010

A new pictures added to Tide box

I forgot to add the close up of the hot water heater
one of my favorite parts of the whole project!
I also added a new picture of the lady of the house.
Check it out!

My lastest project-Tide box laundry room


I made most everything in here. The sink is purchased. The Washer & dryer are printables from Jim's site. They are done on photo paper and I added "insides" to it and made openings. Added some beads brads for knobs on the machine control and wooden handles painted black. Clothes hanging from thrift store.
I made the water heater from TP Roll(a tip from a group friend Janet Whittig.),cut down to about 4 inches wrap it afew times with freezer paper. Inside are glued caps from bottle that you can't see for stability then I added a flat milk lid for the bottom in blue and a wooden circle on top, drilled holes for the pipes and 2 tiny thin straws painted "brass." brown paint and a little oak stain mixed. I added the printies to it from heaters I found on line. I used an earring back for a faucet at the bottom and a tiny block of wood sanded on the back to fit on the "roundedness" of the heater.
I made all the things in the blue shelf cabinet with printies I made from graphics on line. The shelf with the pitchers on top I got from allabout.com /Leslie Shepherd. I made the mop, swiffer and dust pan (it's a graphic from on line) the laundry signs I found on line as well and some are printies like Tide on the white shelf and Spic & Span I got from my group.
I made the ironing board in my RL group. The spay starch is a printie, iron is purchased, shirt I made. The rug in front of the W&D is a graphic as well. Sink is purchased, basket with laundry & tide and all the hangers are purchased also. The wallpaper is scrapbook paper is from Joanne's,The flooring tile is from a large single piece from the True Valu. The blue cabinet and white shelf are both from the same bashed Michael's hutch. The shelf on the left side is purchased I added a pole to hang the clothes on. I made the plant from the Dollar Tree store and pot is purchased. Trash can is a thimble from DT store and filled with real lint from my dryer! I have a "dryer sheet" showing in the dryer but can barely see it.I guess I have to move it to see it. The cat box is a jelly container filled with sand & glued I even put tiny clay "poop" in the litter box LOL. I think I mentioned everything...